🆕 New in Version 3.3
OGraf web graphics, Media relink, test pattern tone and more...
See what's new →🆕 New in Version 3.3
OGraf web graphics, Media relink, test pattern tone and more...
See what's new →How to integrate H2R Graphics into your vMix workflow to show graphics to your live audience.
Adding H2R Graphics to vMix is super straight-forward and offers lovely clean graphics, thanks to the integrated browser in vMix.
Start by launching both vMix and H2R Graphics. So far, so good.
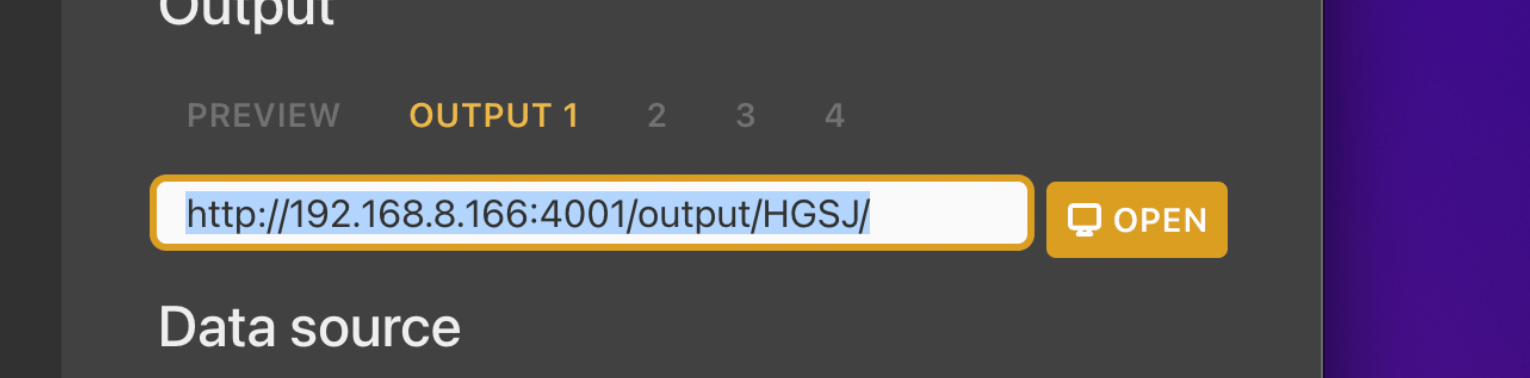
Open your desired project in H2R Graphics and copy the output URL.
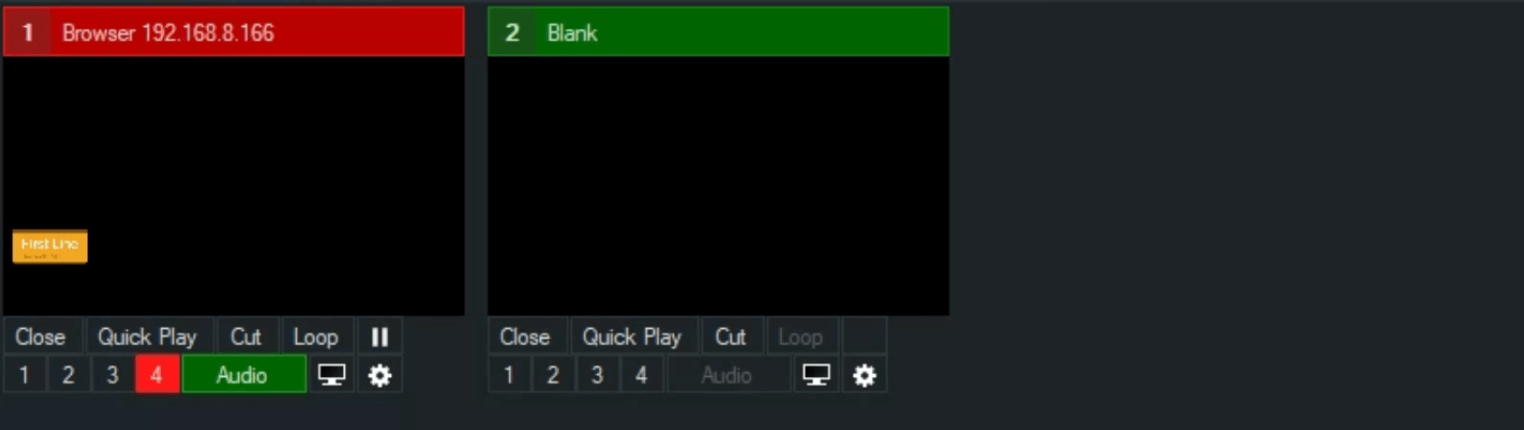
In vMix, add a new Web Browser input and paste in the URL copied from H2R Graphics.

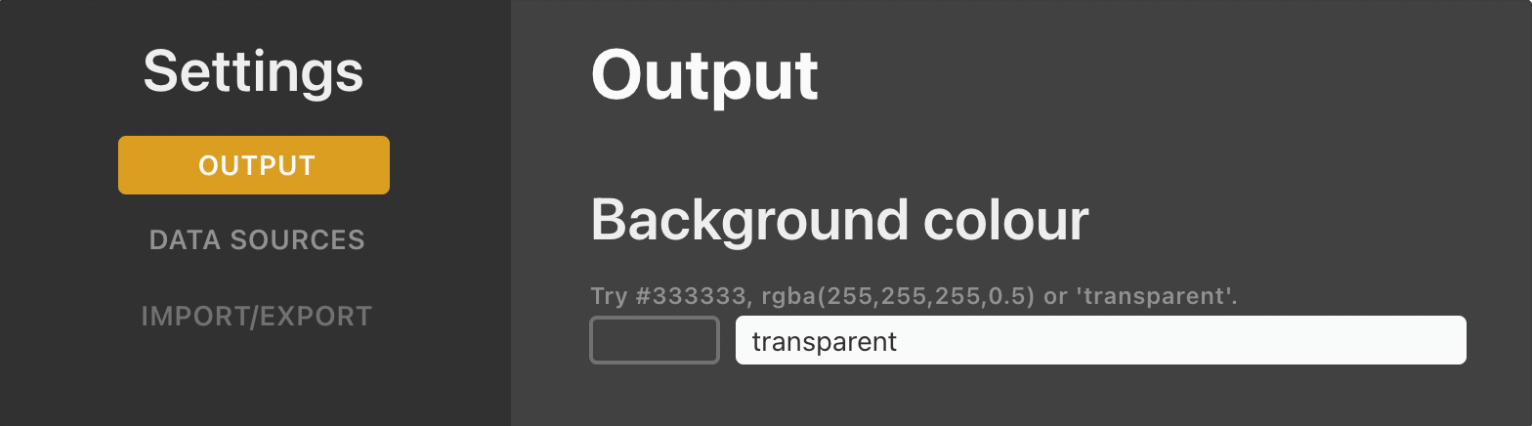
By default, H2R Graphics outputs have a green background colour.
Open the Launcher > Output and then set the background colour by typing in “transparent”.
Use an overlay to place your graphics on top of your vMix output. Done!
Simplify your graphics workflow
Start using graphics on your live stream or video productions.