Custom HTML
H2R Graphics support the importing of your very own HTML files.
Getting started
If you are not familiar with building HTML graphics we recommend checking out Loopic.io. It’s a quick and easy way to build HTML graphic right in your browser.
We’ve created a pretty simple .loo file that you can import right into Loopic to get started: Sample Loopic File (UP_NEXT.loo).
Just want to try a HTML file? Download and import this HTML file: Sample File (UP_NEXT.html).
Adding editable attributes
If you want to have certain elements of your graphic editable within H2R Graphics, you can set keys in Loopic which will then be parsed in H2R Graphics and be made editable.
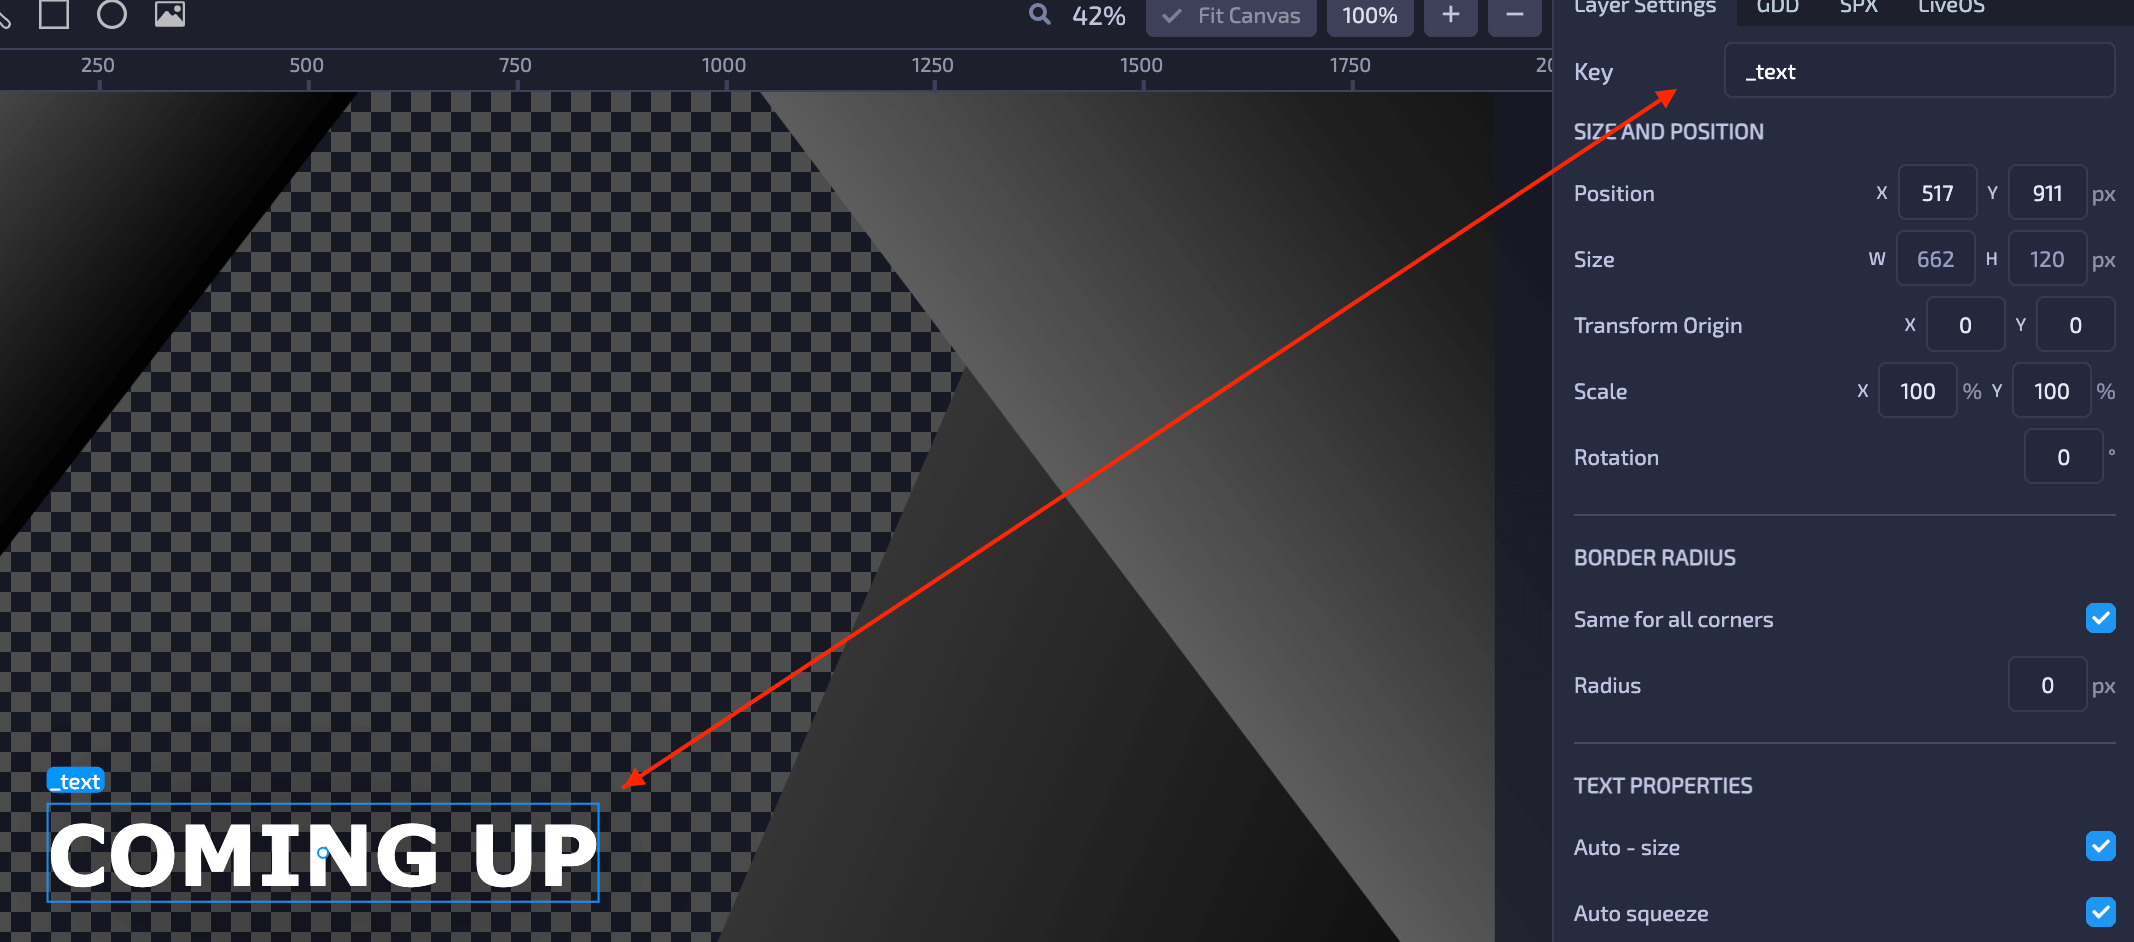
Importing this graphic into H2R Graphic will export the _text input. Editing the input will update the graphic!

Exporting from Loopic
Be sure to use the CasperCG option when exporting from Loopic. This will ensure the proper underlying attributes are copied into the HTML file.

How it works
- Add a
Custom HTMLgraphic to your H2R Graphics project. - Import your
.htmlfile into the content section of the graphic.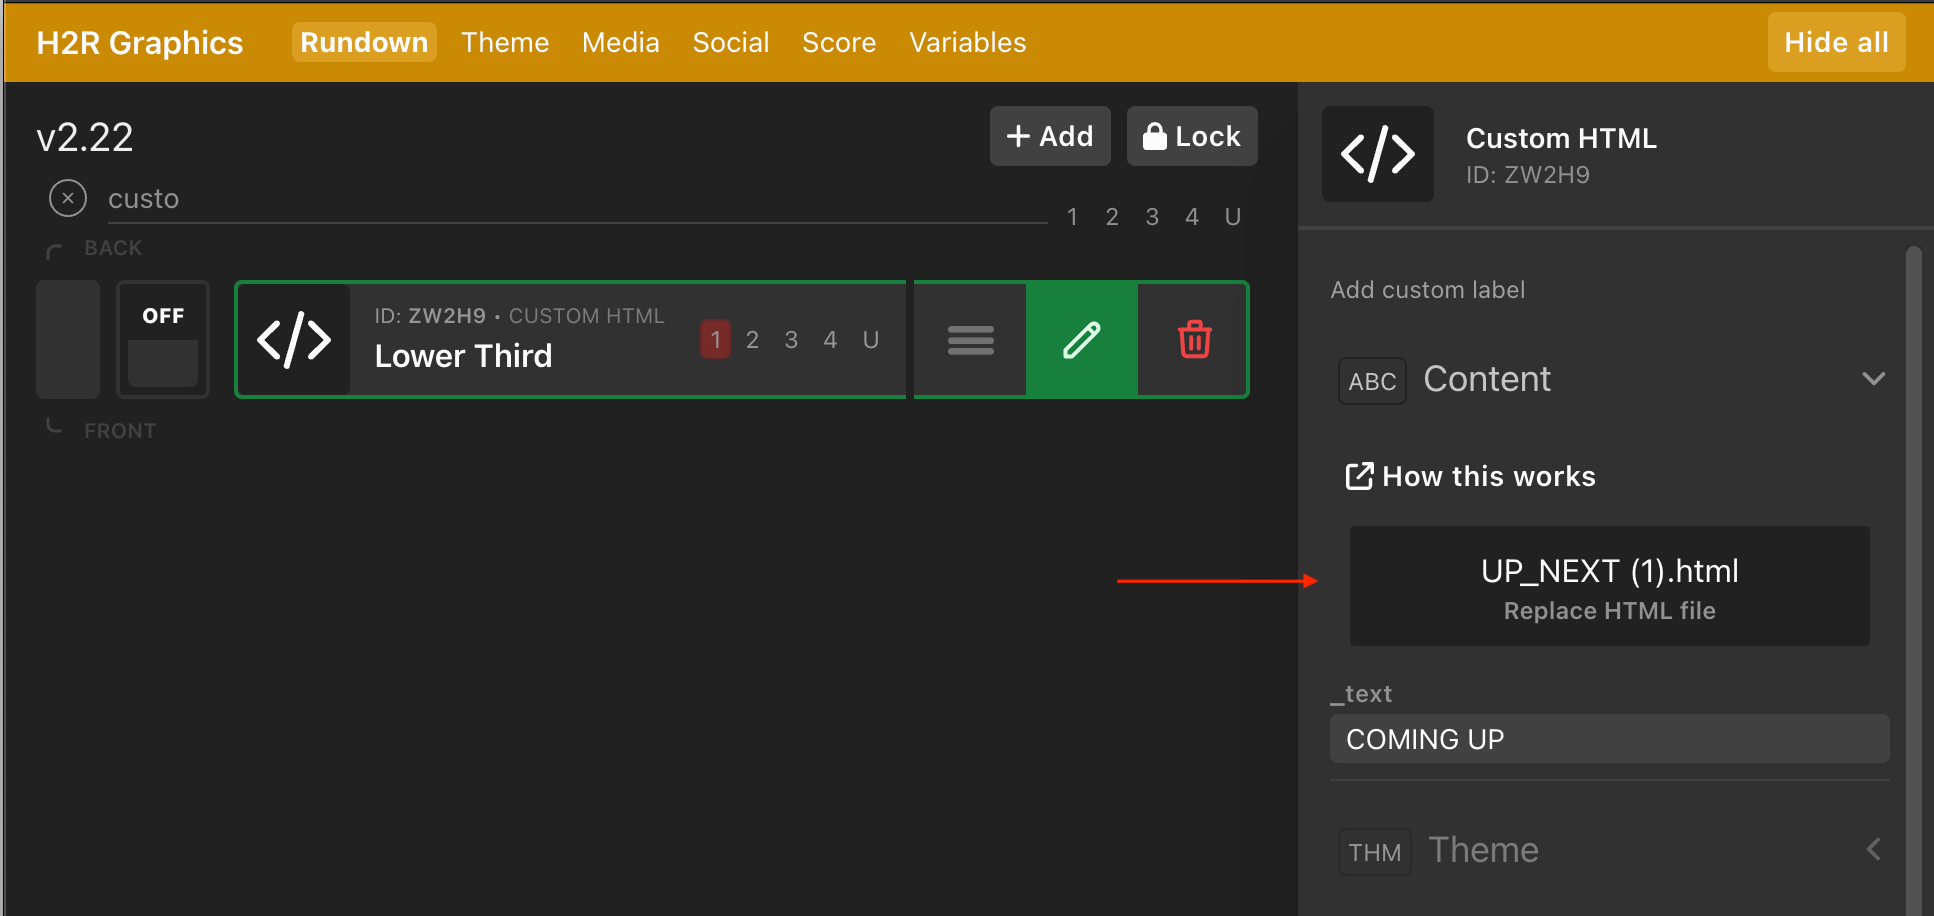
Importing the HTML file - Bring the graphic on-air and you will see your custom html!
Walkthrough video
Building your own HTML files
You can of course build a HTML file in any app or software of your choosing. Here are a few tips to get it working right with H2R Graphics.
Properly formatted document
Make sure the HTML file you create is properly formatted from the start. You can grab a basic HTML file from here.
Animations
When coming on-air and going off-air the Custom HTML graphic will run a global function play() which should contain all of your animation.
Additionally, H2R Graphics will call the update() function when you are making changes to editable inputs. Here is a really simple example that works specifically for the _text example.
<script>
    let played = false

    function play() {
        if (played) {
            getElementById('_text')[0].classList.remove('shown') // should be document.get...//
            getElementById('_text')[0].classList.add('hidden') // should be document.get...//
            played = false
        } else {
            getElementById('_text')[0].classList.add('shown') // should be document.get...//
            getElementById('_text')[0].classList.remove('hidden') // should be document.get...//
            played = true
        }
    }

    function update(incomingChange) {
        const _text_ = getElementById('_text_') // should be document.get...//
        Object.entries(JSON.parse(incomingChange)).map(([key, value]) => {
            if(key === '_text_') {
                _text_.innerText = value
            }
        })
    }
</script>
Editable inputs
We use the Graphics Data Definition (work in progress) spec in order to parse out the custom editable sections within your graphic.
Learn more about the Graphics Data Definition work on superflytv.github.io/GraphicsDataDefinition.
Your HTML file should include a script tag similar to the following.
<script name="graphics-data-definition" type="application/json+gdd">
    {
        "$schema": "https://superflytv.github.io/GraphicsDataDefinition/gdd-meta-schema/v1/schema.json",
        "title": "",
        "description": "",
        "type": "object",
            "properties": {
              "_text": {
                  "type": "string",
                  "label": "Text",
                  "description": "Text",
                  "default": "COMING UP",
                  "gddType": "single-line",
                  "pattern": ""
              }
        }
    }
</script>
Notice the properties being a object of editable properties within the graphic.
The _text property can be used to look for the div with the same ID.
<div id="_text">COMING UP</div>